Task management usually falls apart not because the tool is too weak, but because everything gets forced into the same place. Random errands, small tasks that need to happen today, multi-week projects, and ideas that might become real someday all get thrown into one list. Eventually, that list becomes another storage closet you stop wanting to open.
My conclusion is that digital life task management should triage first, then execute. Short tasks go into Reminders for quick capture. Work with a real time commitment goes onto the calendar. Projects that need planning, breakdown, and review belong in Notion LifeOS.
Core Logic: Triage First, Then Execute
I no longer think of task management as “put everything into one master list.” The first step is deciding which system a thing belongs in. Different tasks don’t need the same tool; they need different levels of speed, structure, and commitment.
Before something enters my system, I usually ask three questions:
- What output does this support? If I can’t connect it to a project, a deliverable, or a life goal, I don’t put it into the system yet. Otherwise, Notion just becomes a new storage closet.
- Can I sit down and start the next step? If I still need to figure out “what exactly do I do?”, then it isn’t a task yet. It’s still a problem that needs more breakdown.
- What would count as done? If the exit criteria aren’t defined upfront, the task can stay “almost done” forever while still occupying attention.
That’s why this workflow uses Reminders, the calendar, and Notion at the same time. It isn’t about stacking tools; each one owns a different layer. Reminders captures quickly, the calendar turns work into time commitments, and Notion handles projects that need planning, breakdown, and review.
Personal Task Management
Guiding Principles
Act immediately on short tasks, plan thoroughly before acting on large ones. Small things shouldn’t sit around — handle them as soon as you think of them. Big things shouldn’t be rushed — break them down clearly before starting, so you don’t end up mid-project realizing you’re headed the wrong direction.
When estimating how long a task takes, there’s one important rule: estimate high, not low. Better to give yourself more time than to cut it too tight, because almost every task runs into something unexpected along the way.
I also track the actual time spent on each task as a reference point. After each Sprint wraps up, I look back and analyze — gradually building a feel for how long different types of work actually take. This isn’t something you can nail right away; it’s something you calibrate over time through consistent tracking and adjustment.
Time Blocks
The time block is the unit I use most for time management, with each block being 1 hour. After accounting for sleep, there are about 16 hours in a day — but I don’t schedule all of them. Meals take up roughly 3+ hours (lunch and dinner combined), and I keep another 2–3 hours as buffer. That leaves about 10 usable time blocks per day.
On the calendar, I use different colored calendars to distinguish different types of events:
Daily Life, Social, Project Development, Meetings, Self-Learning, and so on.
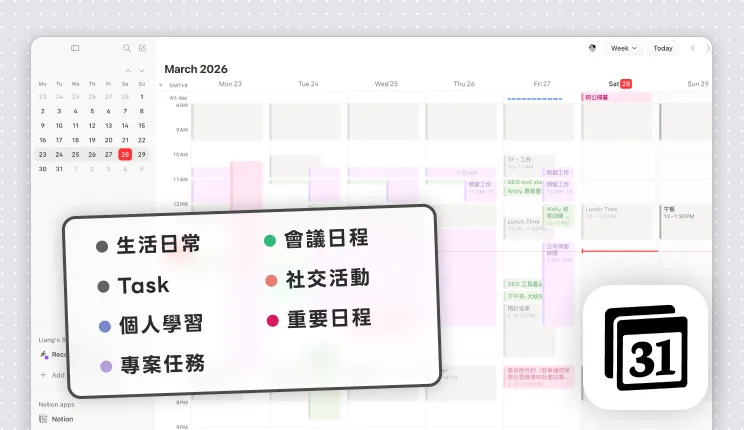
The color coding makes it easy to see at a glance whether the day’s time is balanced, so no single category quietly takes over. Each calendar type also has its own default notification settings, so I don’t have to manually adjust reminders every time I create an event — I just pick the right calendar and it’s set.
I also separate “time blocks” from “timeboxes.” A time block is just an empty container of time. A timebox connects a specific task, a time budget, and a stopping point. I don’t put vague entries like “work on project” on the calendar; I prefer something with an exit, like “14:00-15:00 outline article structure.”
If the timebox ends and the task isn’t done, I don’t automatically let it expand forever. I decide whether to reduce scope, split it into the next task, or move it into another timebox. That keeps work from quietly swelling until it consumes the time I meant to protect for other things.
With the time block framework in place, here’s how I match different tools to different task sizes:
Tasks under 5 minutes
I use Siri to quickly create an Apple Reminder. These are usually spontaneous to-dos that pop into my head — “reply to that email,” “pick up that thing” — and I don’t need to open any app. I just say it out loud, and if I specify a time (“remind me tomorrow at 3pm to reply to that email”), Siri sets it up automatically. Combined with the iPhone home screen widget, today’s to-dos are always visible without even unlocking the phone.
Tasks around 1 hour
I block out an hour directly on the calendar, slotting it into today’s or the near-future’s buffer time. These tasks have enough weight that they need dedicated time, but they don’t need to be broken down into multiple steps — things like “research a technical approach” or “clean up a document.” The calendar entry makes sure that time actually gets set aside.
Tasks over 2 hours
Larger tasks go into the LifeOS system I’ve built in Notion.
Notion LifeOS
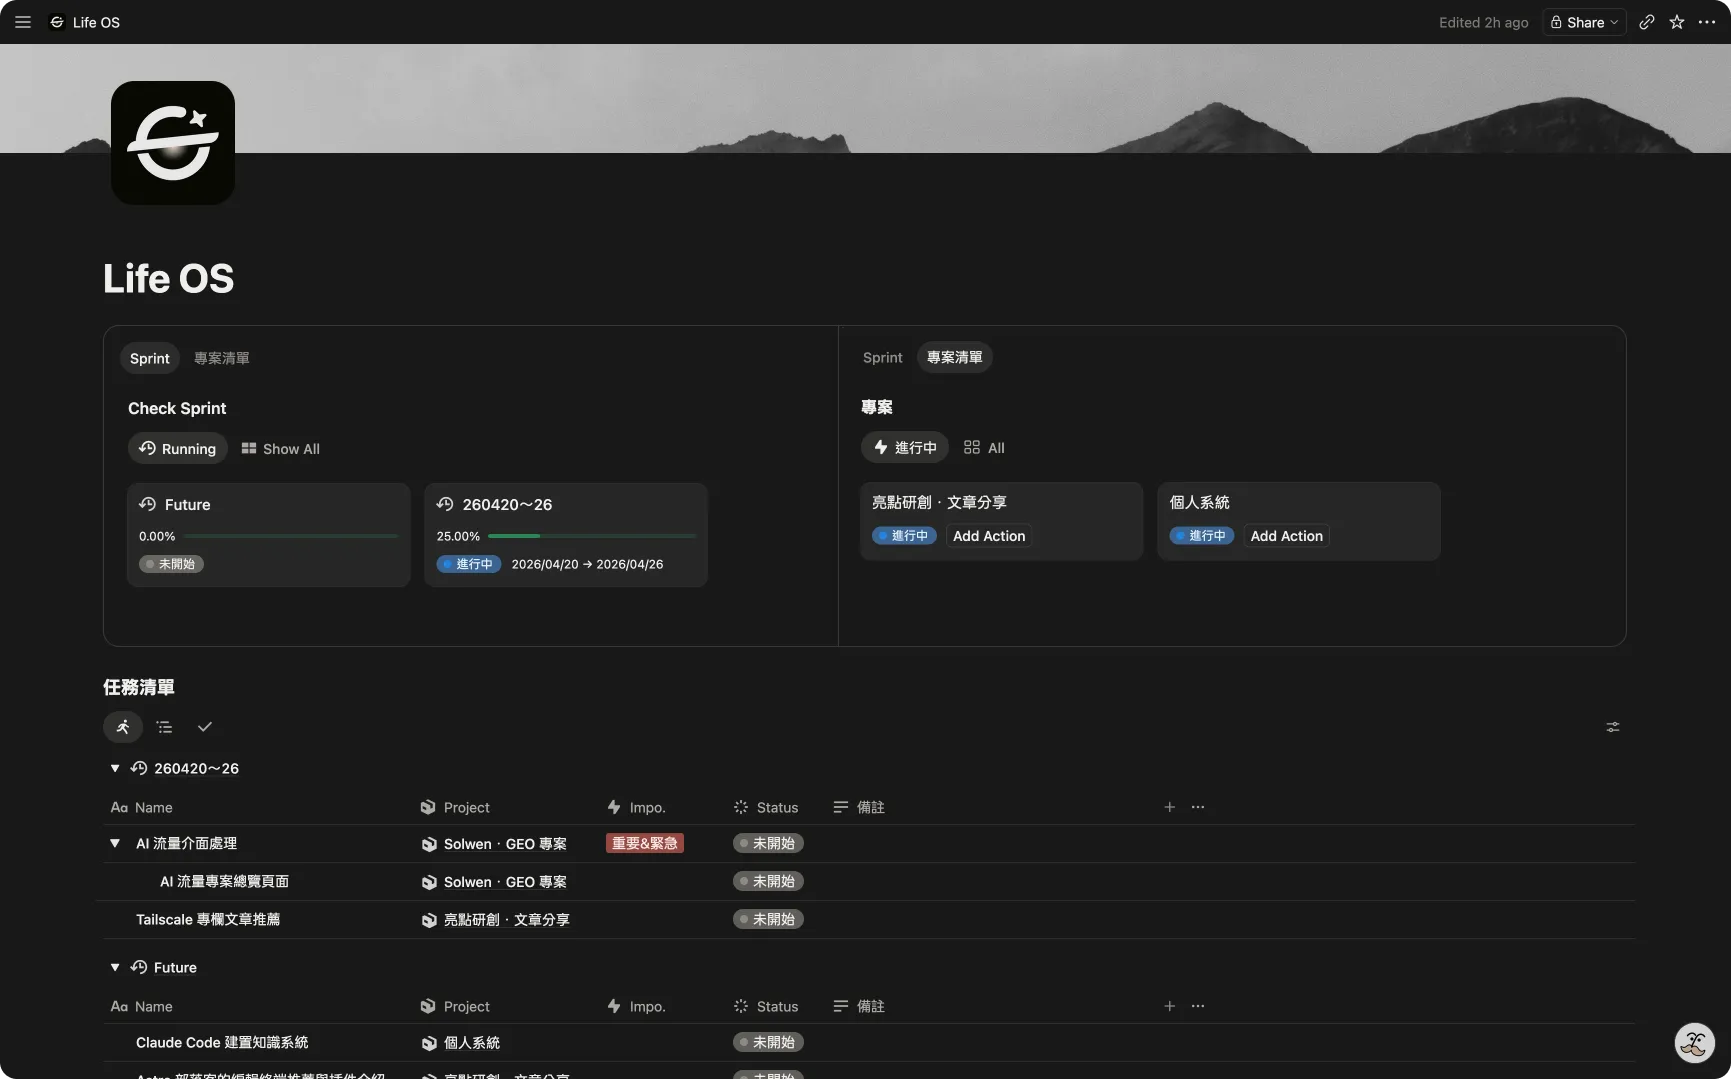
This is the personal management system I’ve set up in Notion to handle tasks over 2 hours and longer-term goals.
Database View Configuration
In Notion, I set up Views based on what I need to see:
Projects
- Uses Gallery View, displaying each project as a card with a cover and summary.
- Sorted by current project status (State), so I can quickly tell what’s in progress and what’s on hold.
Actions
- Uses Table View, grouped by Sprint via a Relation field, so I can see which action items belong to each iteration. Items not yet assigned to a Sprint show up separately.
Master Lists
- Active Overview: Filtered to show only stages that require my attention — focused on what I actually need to deal with right now.
- Full Overview: No filters — a complete history of all projects and actions for reference.
The core structure looks like this:
Vision
└── Project
    ├── Action Plan A → linked to Sprint 1
    │   ├── Sub Plan
    │   └── Sub Plan
    ├── Action Plan B → linked to Sprint 1
    ├── Action Plan C → linked to Sprint 2
    └── Action Plan D → (not yet assigned to a Sprint)
Action plans belong directly to their project, and Sprints are connected via optional Notion Relations. The advantage here is that action plans aren’t locked into a specific Sprint — if something doesn’t get done in one Sprint, you just change the link to the next one without moving data around. Action plans can also be created and queued up before a Sprint slot is ready for them.
Project Boxes and Slow-burn Projects
Each Notion project page is more than a task list. It’s a project box. Requirements, references, meeting notes, decision rationale, ideas, and open questions related to that project should all be able to live back inside the same project page.
The benefit is that whenever I capture something, I can ask: “Which box does this go into?” If I can’t name the project, then the thing may be interesting, but it doesn’t yet have a use. That question filters out a lot of “maybe useful someday” accumulation.
Not every project needs to enter a Sprint immediately, though. I separate projects into two states:
- Sprint Project: Something I’m actively pushing forward and breaking into 1-2 week Sprints.
- Slow-burn Project: Something with a clear direction, but not active execution yet. I use it to collect material, examples, and ideas until the timing is right.
For me, a slow-burn project is not a generic someday list. It’s an incubation space with a real output direction. Once there is enough material and the timing makes sense, the whole thing can be promoted into a Sprint Project.
Visions and Projects
Each project maps to an overarching vision, making sure what I’m doing stays aligned with long-term direction. For example, “improve technical skills” is a vision; “learn Rust” or “refactor personal site” are projects underneath it.
When creating a project, I try to make the goal checkable instead of leaving it as a broad direction. “Learn Rust” is closer to a topic. “Build and deploy a small tool with Rust” is closer to a project. That difference matters because a project needs time allocation, task breakdown, and a way to know whether it was actually delivered.
I set at most three visions per year to avoid spreading my focus too thin. Projects have five states:
- Planning: Still in the thinking and breakdown phase, not yet started.
- In Progress: Currently being worked on.
- On Hold: When a project clearly can’t meet its goals in the near term, or the difficulty exceeds current capacity, I archive it and wait for the right conditions to restart.
- Completed: Goals achieved and deliverables produced.
- Abandoned: Officially decided not to continue after evaluation.
I also simplify the project lifecycle into four stages:
- Initiate: Clarify why this is worth doing and what outcome I want to deliver.
- Plan: Break down action plans, estimate time, and decide priority.
- Execute: Put the work into Sprints and the calendar, then track blockers and changes.
- Close: Check whether the outcome was actually delivered, capture what I learned, and decide whether the project is completed, paused, or abandoned.
This keeps me from only looking at “doing tasks.” It reminds me that projects need clarity before they start and a real closing step when they end.
Action Plans
Projects are broken down into specific action plans. A few principles when creating them:
- Must be a concrete action: Each action plan needs to map to a real, specific behavior — not a vague goal. “Optimize performance” is too abstract; “get homepage load time under 2 seconds” is a concrete action.
- Break it down to 1–2 hours: If an action plan is expected to take more than 2 hours, break it down further into sub-plans until each task is roughly 1–2 hours of work.
- Every action has a verifiable outcome: Completion must produce something concrete that proves the work is actually done — not just a feeling that it’s “about done.”
I also add a lightweight “definition of done” here. When creating a task, it’s useful to write down what done actually means:
- An article isn’t done because I wrote part of it. It is done when the draft is complete, the structure is checked, and it is ready for editing.
- A feature isn’t done because the code is written. It is done when the main scenario has been run, verified, and the necessary documentation is updated.
- Learning isn’t done because I finished the material. It is done when I produce a small demo, exercise, or reusable note from it.
The point isn’t to make every task feel formal. It’s to avoid leaving work in the gray zone of 80% done. If the completion standard is clear upfront, Sprint review doesn’t have to guess whether something actually counts as finished.
Scrum Sprints
Each project is advanced through multiple Sprints, typically 1–2 weeks each. Each Sprint picks a set of action plans or sub-plans from the project. Sprints aren’t just units of task management — they’re also regular checkpoints for reflection:
- Task completion review: How many planned tasks finished on time? How many got stuck? Use this to adjust the next Sprint’s scope and priorities.
- Blockers and resource assessment: For tasks that stalled, figure out why — not enough breakdown, missing prerequisites, or insufficient resources — to make sure the project can keep moving forward.
- Definition of done check: Make sure the Sprint output is actually usable, deliverable, or verifiable — not just something I touched.
- Efficiency improvement thinking: Review isn’t just about diagnosing failures. It’s also about asking where you could go faster and better. Are there repetitive tasks that could be automated? Are there better tools or processes worth adopting? Process improvements don’t always pay off immediately — researching and building automation takes time upfront. But in the long run, it’s a strategic investment. A simple rule: if a process runs more than 3 times, it’s worth exploring automation.
Reminder to Notion Shortcut
The hardest part of LifeOS isn’t planning inside Notion — it’s getting the flash-of-insight idea into Notion in the first place. At a computer, no problem. But when something hits you while walking, commuting, or fresh out of the shower, pulling out your phone, unlocking it, opening Notion, switching to the right database, and filling in the fields — that few seconds of friction is enough for most ideas to slip away.
By contrast, Apple Reminders lets you capture something with a single line to Siri — there’s no way opening the Notion app manually beats that for speed. So my approach is to treat Reminders as the pre-stage buffer for LifeOS, then use a shortcut to sync items into Notion one by one.
The sync flow has four steps:
- Create a Reminders list called Notion Catch. Everything destined for LifeOS goes there first
- When the shortcut runs, it scans the incomplete items in the “Notion Catch” list
- It uses the Notion API to create each item as a new page in the LifeOS database
- On success, the shortcut writes the Notion page URL back to the original reminder and marks it complete
The nice thing about this setup is that every sync leaves only the “not-yet-in-Notion” items in Reminders. Synced items get marked done with a Notion link attached — no duplicate uploads, and you can always trace a reminder back to its Notion page.
Here’s what it looks like in practice. I dropped two items into Notion Catch — “Research agile development methodology” and “Research how to use Monday.com” — and after running the shortcut:
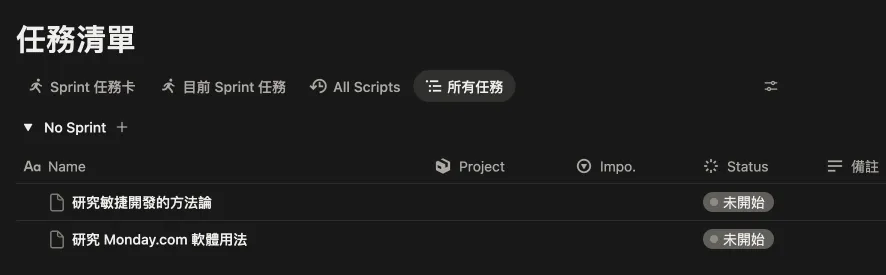
On the Notion side, both items get written into LifeOS under the “No Sprint” group of the all-tasks view, waiting to be assigned to a Sprint.
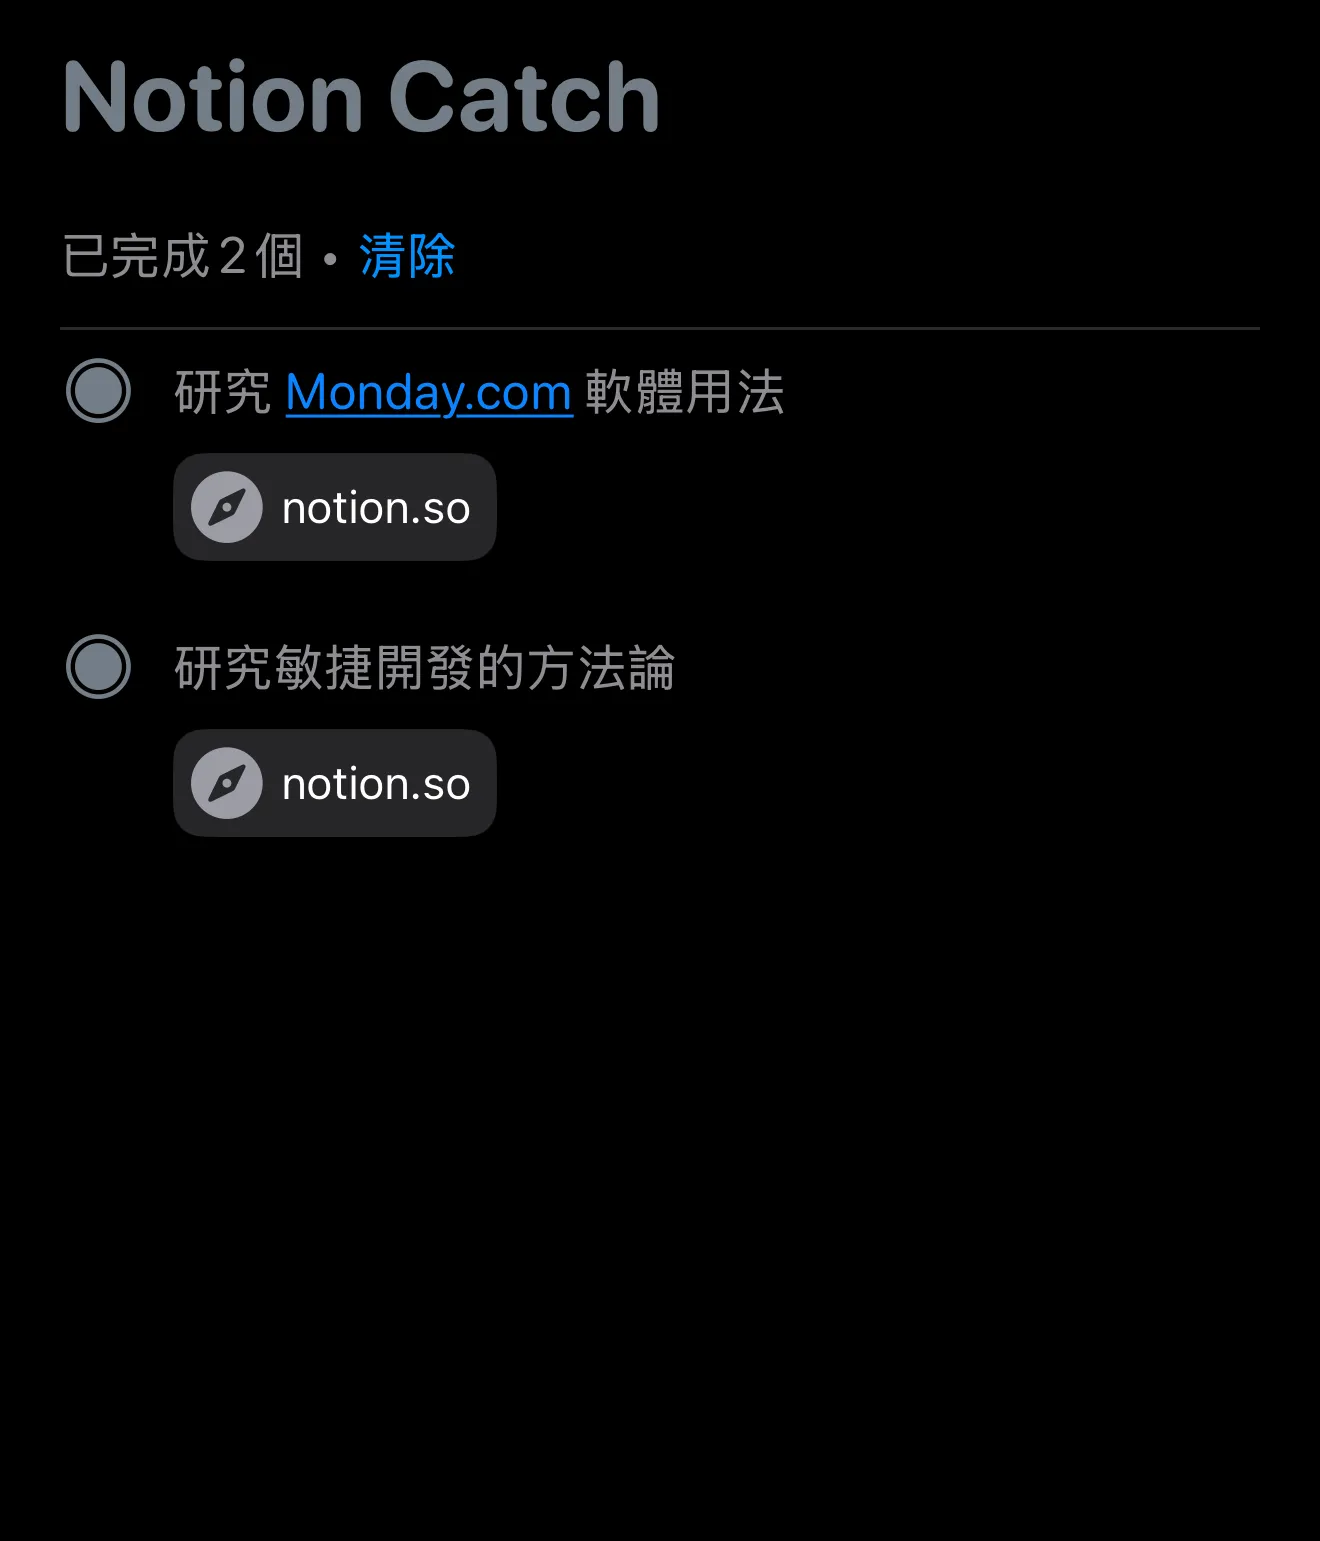
On the Reminders side, both entries are now marked complete with the matching Notion URL — so when you want to trace which page an idea ended up on, the link takes you straight there.
Download ShortcutInstallation Steps
After downloading, you still need to set things up on the Notion side so the shortcut can write into your database. The whole process takes four steps.
1. Create a Notion Internal Integration and grab the API Token
Head to the Notion Integrations page and create a new Internal Integration. Turning on the “Content” permission group is enough for this shortcut. If you plan to extend the integration later, flip Read / Update / Insert on while you’re there. Once created, you’ll get an Internal Integration Token — copy it and keep it handy.
2. Get the task database’s Data Source ID
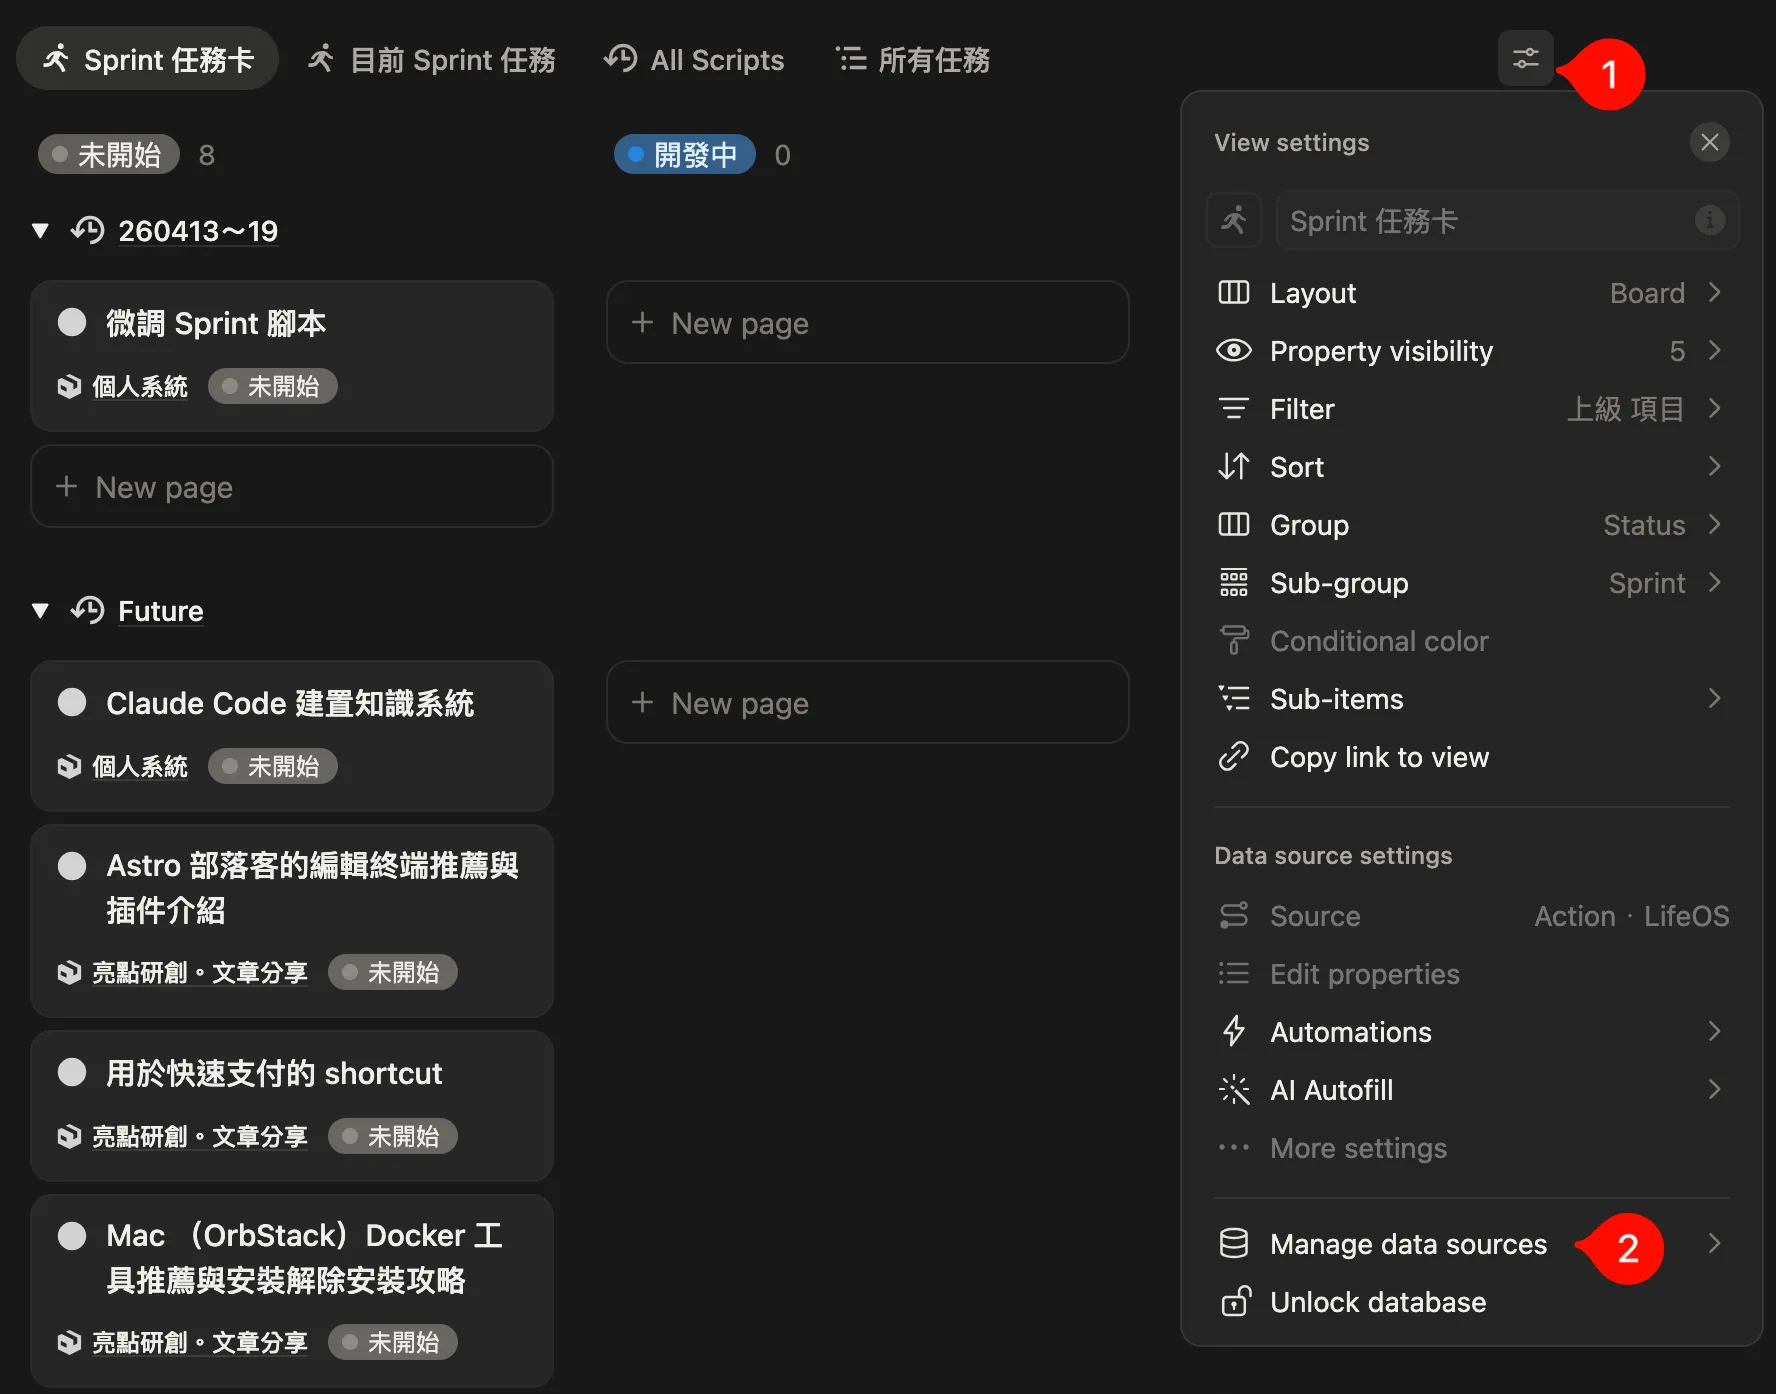
Open the view of the task database you want to sync to, click the view settings icon in the top right, scroll to the bottom, and pick Manage data sources.
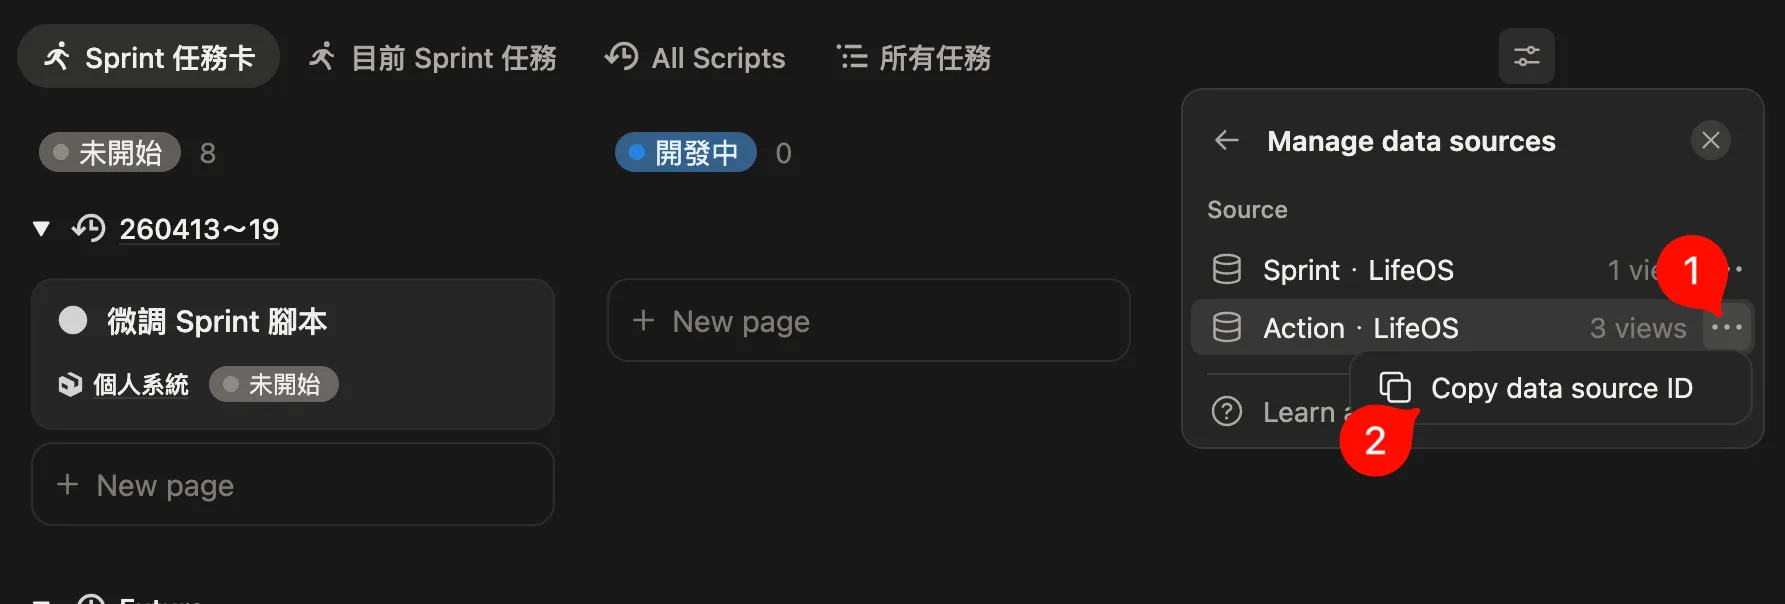
Click the ”…” next to the relevant data source and choose Copy data source ID. This ID is the destination where the shortcut will write new pages.
3. Add the integration to the database
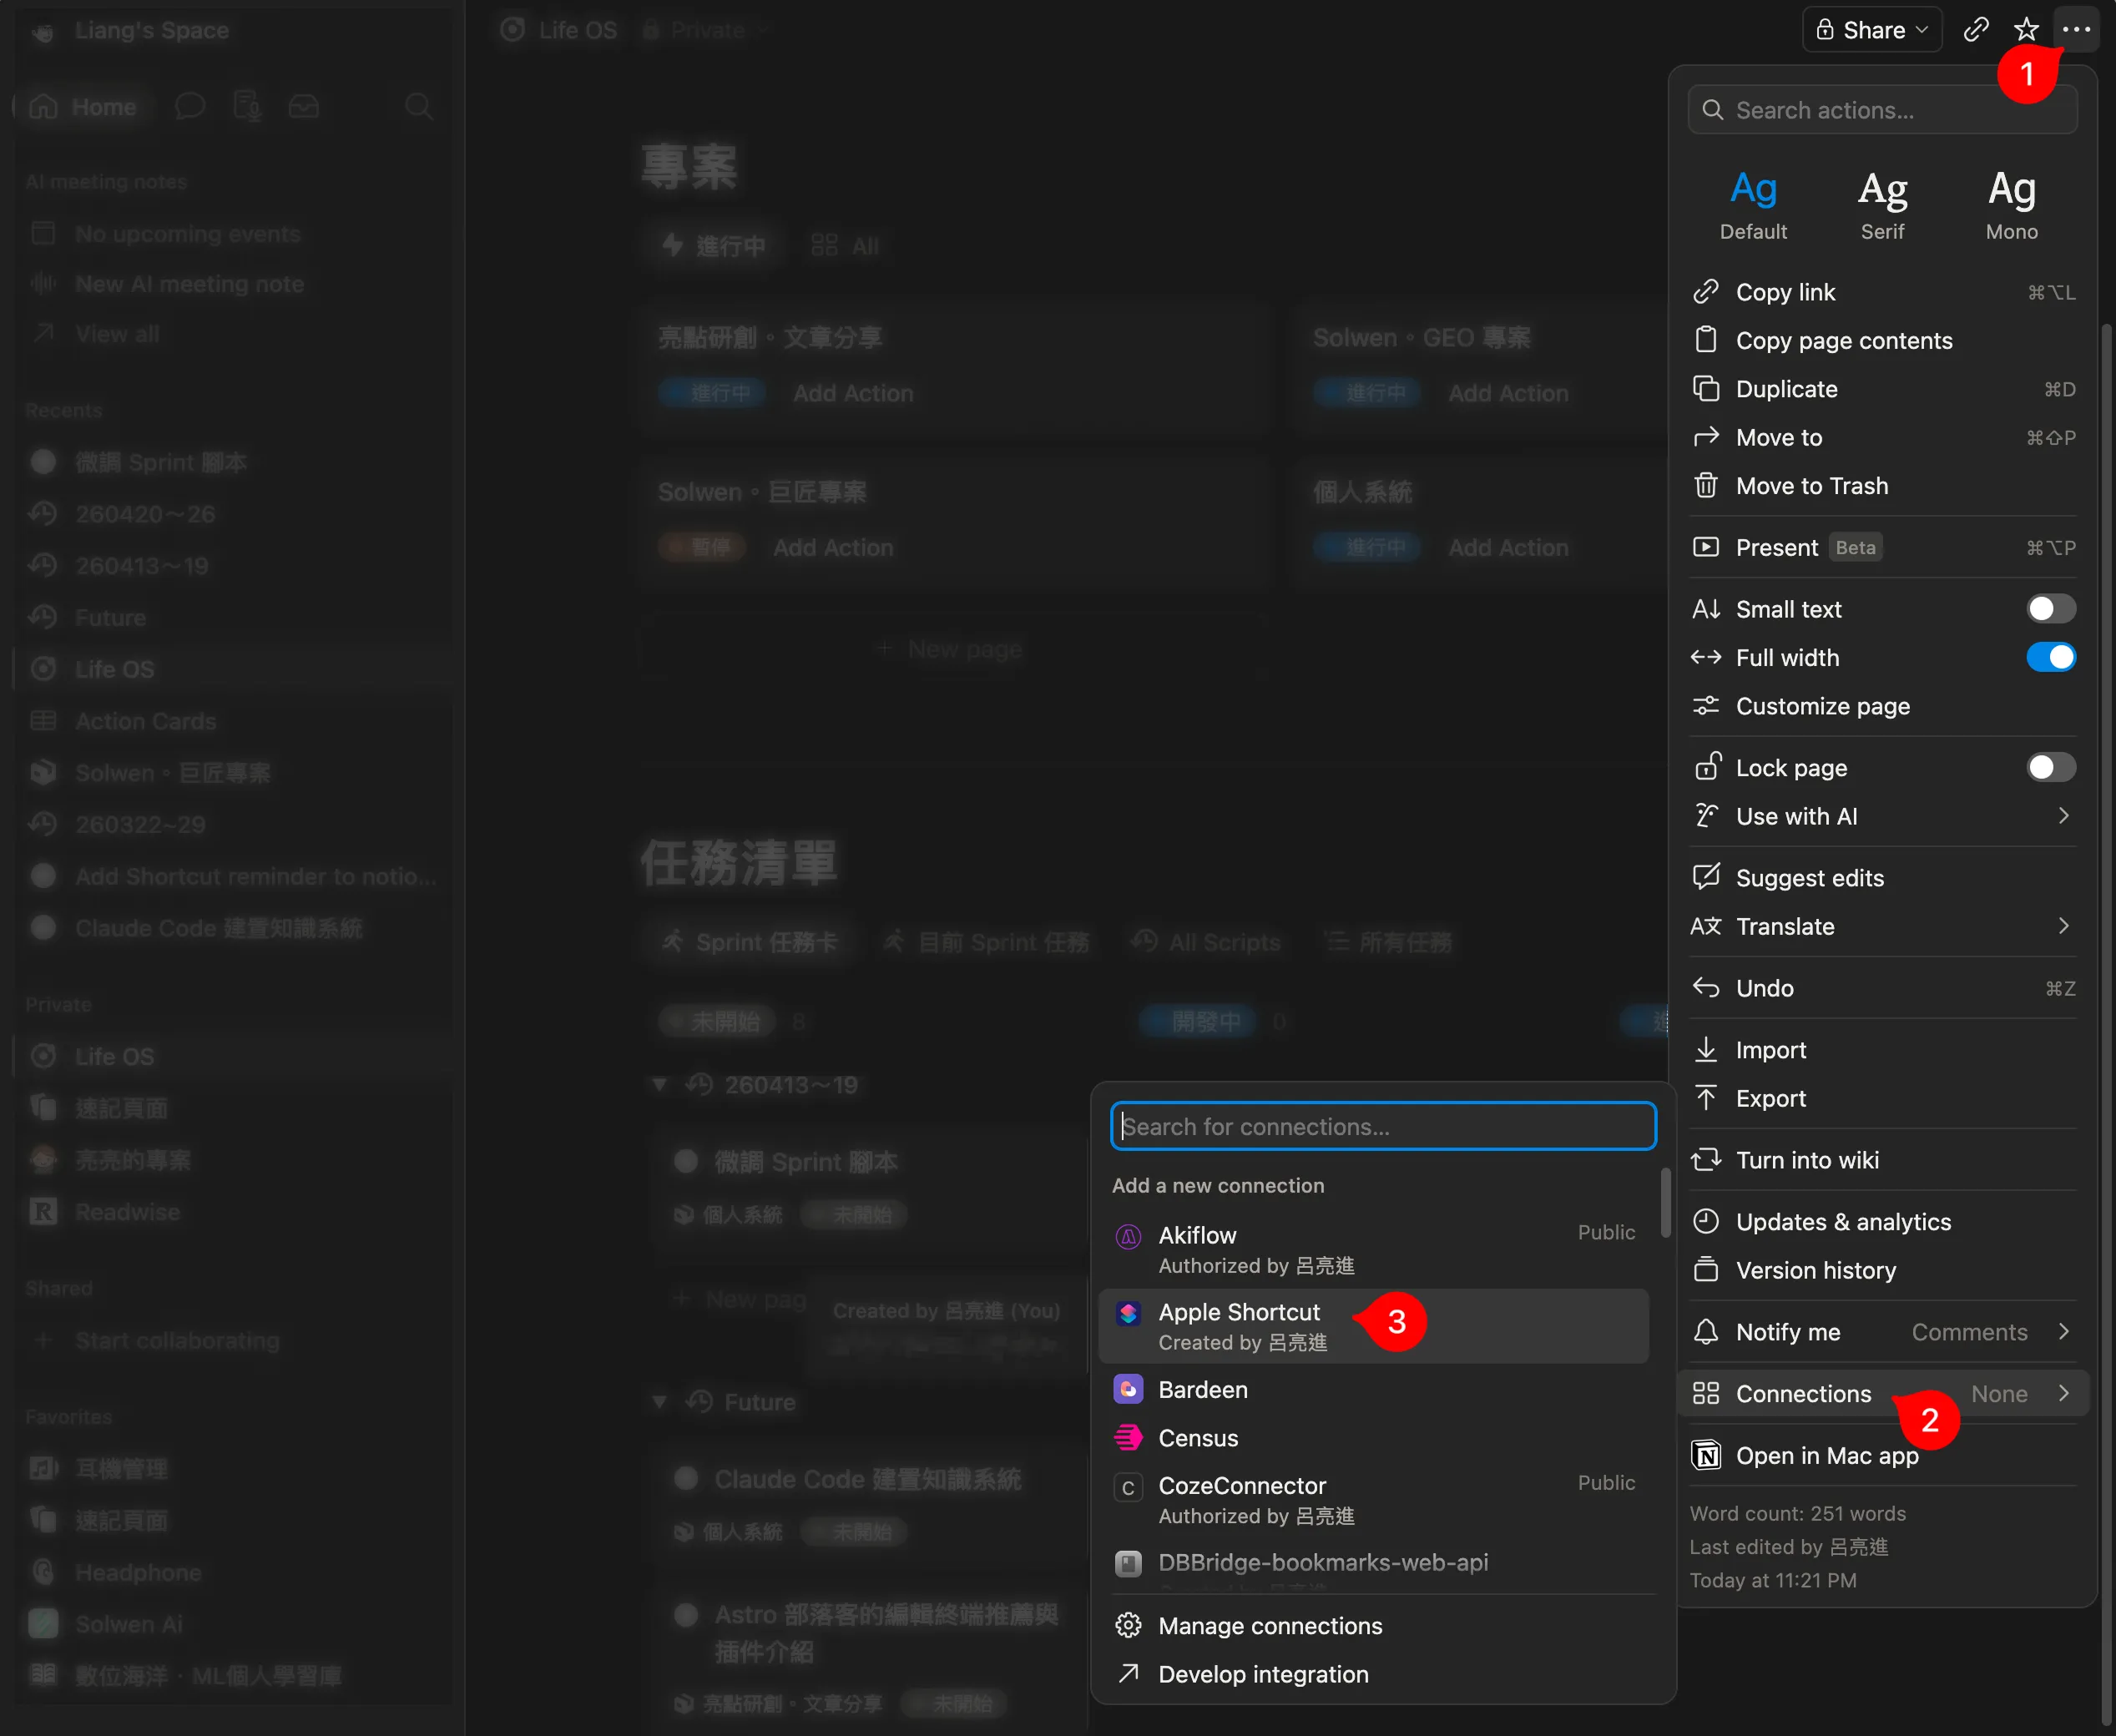
Go to the full database page (the page that contains the DB, not an inline view), open the ”…” menu in the top right, scroll down to Connections, search for the integration you just created, and add it. Skip this step and even with the right Token and ID, the API call will fail for lack of permission.
4. Paste the Token and Data Source ID into the shortcut
The first time you run the shortcut, it’ll prompt you for the import values — paste in the Notion Token and Data Source ID. From then on, every run will automatically sync the incomplete items in Notion Catch into LifeOS.
Meeting Management
Notion Calendar + Google Calendar
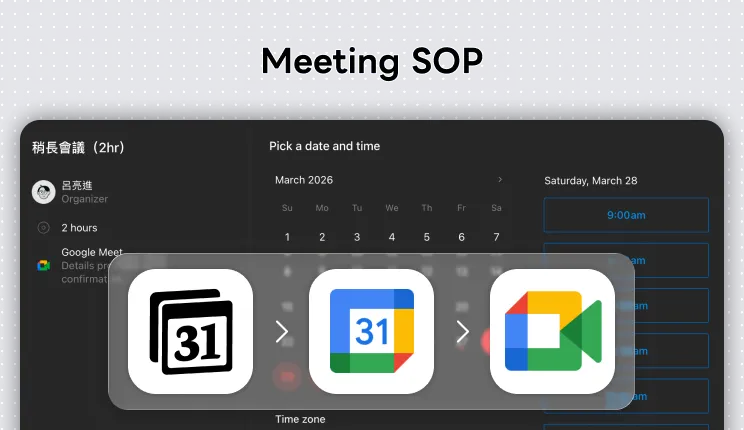
My calendar management is centered on Notion Calendar, synced with Google Calendar. All my events — whether work-related or personal — are viewed and managed in Notion Calendar.
When I need to schedule a meeting with someone, I can generate a meeting link directly through Notion Calendar and share available time slots. Once they pick a time, the event is created automatically — no back-and-forth needed.
Meeting Scheduling Tool Comparison
Besides Notion Calendar, there are a few dedicated scheduling tools worth knowing:
| Notion Calendar | Calendly | SimplyMeet.me | |
|---|---|---|---|
| Calendars you can connect | Unlimited | 1 | 2 |
| Custom page appearance | Standard page, no customization | Paid plans can customize brand color, logo, banner | Supports custom color schemes |
| Pricing | Free | Free to use, advanced features require subscription | Free to use, advanced features require subscription |
Why I personally chose Notion Calendar:
- Unlimited Google Calendar connections: I have a work Google Calendar and a personal Google Calendar — I need both connected and visible at once, which the free tier of other tools can’t do.
- Completely free: Core features don’t cost anything, which is more than enough for personal use.
- Easy to use: Clean, intuitive interface that integrates with the Notion ecosystem — no extra learning curve.
Group Availability Coordination
The scheduling tools above solve a one-on-one scenario: someone else wants to find a time with you. But there’s another common situation: a group of people needs to find a time that works for everyone — a club meeting, a friends’ dinner, a team activity. Asking “when are you free?” back and forth in a group chat is inefficient. You need a tool where everyone marks their availability and it auto-compares.
I recommend two tools for this, each with its own strengths:
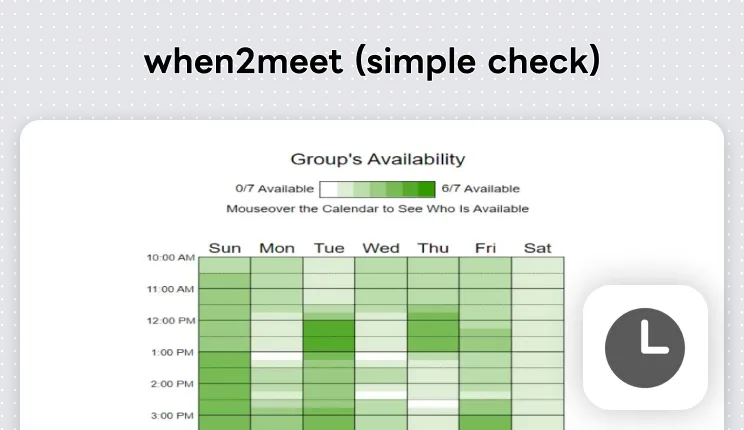
When2meet is the most widely known option. The flow is simple — create an event, pick candidate dates and time ranges, drop the link in the group chat, and everyone drags to mark when they’re free. The system then shows overlap intensity with color gradients, so it’s immediately clear which time slot works for the most people. The biggest advantage: no sign-up required. Open the link, enter your name, and you’re in. Lowest barrier for people who aren’t familiar with tools.
Free When2meet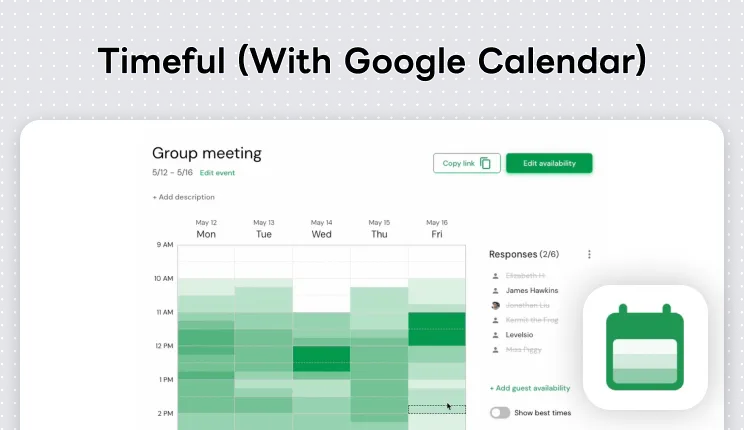
Timeful (formerly Schej) is the more modern alternative. It connects with Google Calendar and Outlook — when participants log in, it automatically pulls their busy times from their calendars, so no manual entry needed. Once a time is confirmed, you can create the calendar event directly inside Timeful without switching to another app. If your team is already on Google Calendar, Timeful makes the whole process much smoother.
Free Timeful